AWS Integration Overview
To integrate AWS billing data with Pelanor, open Integrations → Add Integration → AWS inside the platform and follow the step-by-step wizard.Prerequisites
- Access to your AWS organisation’s management account
- Two CloudFormation templates:
pelanor-integration-management.jsonpelanor-integration-subaccounts.json
Note: Both templates will be available for download in the Integration Wizard, once you start the integration process.
Installation Steps
Management (Billing) Account Setup
Run the Management Account CloudFormation template once for the management account.
If your organization has a shared billing account managed by your MSP which is already connected to Pelanor, you may skip this step.
If your organization has a shared billing account managed by your MSP which is already connected to Pelanor, you may skip this step.
- Log in to the AWS management account.
- Open CloudFormation in
us-east-1. - Click Create stack (with new resources).
- Upload
pelanor-integration-management.json. - Name the stack (e.g.,
pelanor-management-integration). - Click through the wizard, keeping defaults.
- Wait until the stack reaches CREATE_COMPLETE.
Sub-accounts Setup
Run the StackSet on every AWS subaccount you wish to integrate into Pelanor.
- In CloudFormation, open the StackSet tab.
- Upload
pelanor-integration-subaccounts.json. - Name the StackSet (e.g.,
pelanor-subaccount-integration). - In Deployment options, choose region
us-east-1only. - Create the StackSet and wait until all targets show SUCCEEDED.
Although the integration is deployed only in
us-east-1, it grants visibility over all AWS regions.Architecture & Permissions
This section provides a deep-dive into the IAM roles requested by the Pelanor AWS integration.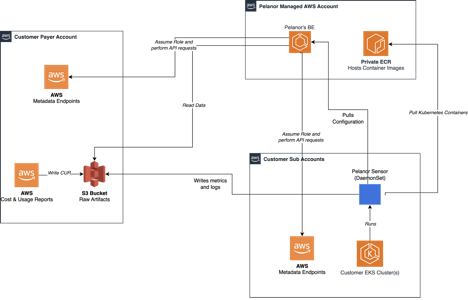
Note that this means that certain cloud costs or platform functionalities might not be available.
Directly-Attached Permissions
| Permission | Why It’s Needed |
|---|---|
athena:BatchGet*, athena:List* | Athena Cost Insights |
autoscaling:Describe* | (Reserved) future EC2 scaling recommendations |
ce:Get*, ce:List* | Cost Explorer cross-validation |
cloudfront:Get*, cloudfront:List* | CloudFront Cost Insights |
cloudtrail:* (Describe, Get, List, LookupEvents) | Map Athena queries → users |
cloudwatch:* (Describe, Get, List) | Collect resource metrics |
compute-optimizer:* | Opportunities (Cost Optimization) |
cur:* | Manage CUR export |
dynamodb:* (Describe, List) | Planned DynamoDB insights |
ebs:Describe* | EBS Cost Insights |
ec2:* (Describe, Get) | EC2 & network insights |
ecs:* (Describe, Get, List) | ECS Cost Insights |
eks:* (Describe, List) | EKS Cost Insights |
elasticache:Describe*, elasticloadbalancing:Describe* | Planned ElastiCache insights |
elasticmapreduce:* (Describe, Get…, List) | EMR Cost Insights |
emr-serverless:* (Get, List) | EMR Serverless insights |
es:* (Describe, List) | Network identifier resolution |
glue:* (Get, List) | Glue Cost Insights |
kinesis:* (Describe, Get, List) | (Reserved) future Kinesis insights |
lambda:List* | Lambda Cost Insights |
organizations:* (Describe, List) | Fetch sub-account metadata |
rds:* (Describe, ListTagsForResource) | RDS Cost Insights |
redshift:Describe* | Redshift Cost Insights |
resource-groups:* (Get, List, Search) | Show tags for all resources |
s3:List* | S3 Cost Insights |
savingsplans:Describe* | Savings Plan coverage/utilisation |
CUR Permissions
The CloudFormation template includes standard IAM actions required to retrieve Cost & Usage Reports (CUR).Further information on these permissions is available upon request.
Bucket Permissions
To access the S3 bucket that stores integration artefacts, the CloudFormation template also grants:Customized IAM Policy
In case your organization’s security policies prevent certain permissions from being granted to third-party tools such as Pelanor, we can create a customized CloudFormation file with a limited set of permissions. Contact Pelanor Support for more information.Comparing Costs with AWS Cost Explorer
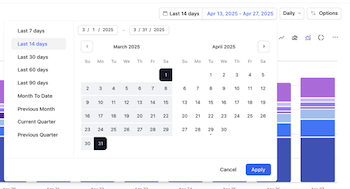
Follow the steps below to ensure a sufficient comparison of costs between Pelanor and AWS Cost Explorer.Cost validation should be performed at least 5 days after the billing period ends, as AWS sometimes posts late adjustments.
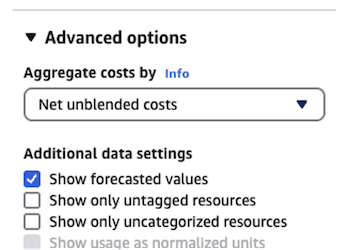
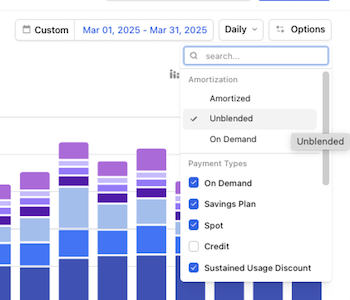
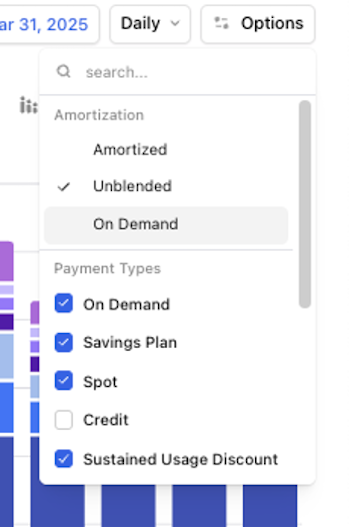
In AWS Cost Explorer

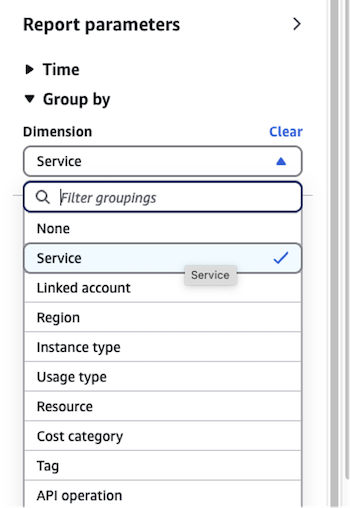
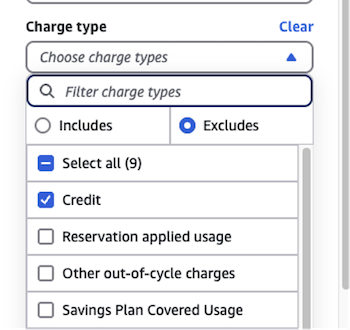
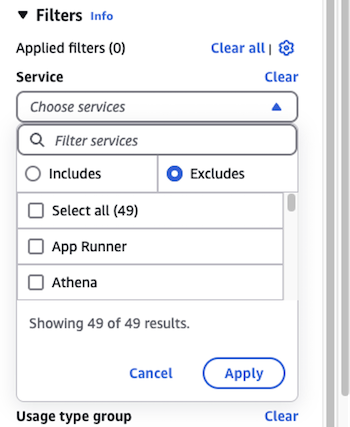
Apply Filters
- Charge Type – exclude Credits, Refunds, Tax.
- If you have special-priced services, exclude them under Service.
In Pelanor
Comparing Results
- Total Cost – Pelanor vs. AWS (expected variance < 1 %).
- Per-Service Cost – identify any services with higher discrepancies.
- Record services that exceed the threshold for further investigation.
If you run into any discreptancies, please reach out to the Pelanor Support team - we’ll investigate and resolve any incosistencies. With your inquiry, include the date ranges you analyzed, as well as screenshots from both Pelanor and AWS Cost Explorer.
Understanding AWS Tag Normalization
Understanding AWS Tag Normalization in Pelanor
When AWS delivers Cost & Usage Report (CUR) data in Parquet format, it rewrites tag keys in a predictable way.Pelanor mirrors these transformations for every AWS data source—CUR files, APIs, or resource logs—so you see a single, consistent tag name.
How Tag Normalization Works
AWS’s Parquet exporter alters tag keys automatically. Pelanor applies the same rules, ensuring tags from all AWS sources line up.Transformation Rules
- Insert an underscore (
_) before every uppercase letter. - Convert all uppercase letters to lowercase.
- Replace non-alphanumeric characters with an underscore.
- Collapse duplicate underscores into a single underscore.
- Trim leading or trailing underscores.
- If the key still exceeds the column-length limit, drop underscores from left to right until it fits.
Examples
| Original Tag Key | Normalized Tag Key |
|---|---|
| ExampleTagName | example_tag_name |
| Example-Tag Name | example_tag_name |
| Environment | environment |
| CostCenter | cost_center |
| AWS:Project | aws_project |
Why We Normalize Tags
- Consistent experience – tags look identical whether they come from CUR Parquet or direct API calls.
- Simpler filtering – no need to remember multiple spellings of the same tag.
- Accurate cost allocation – every source converges under one normalized key.
- Comprehensive reports – filtering by the tag captures all matching resources.
Finding Your Original Tag Names
- In AWS, open Cost Explorer or Resource Groups & Tag Editor.
- Locate the tag keys in their original format.
- Apply the transformation rules above to see how each key will appear in Pelanor.